Synopsis
Intro
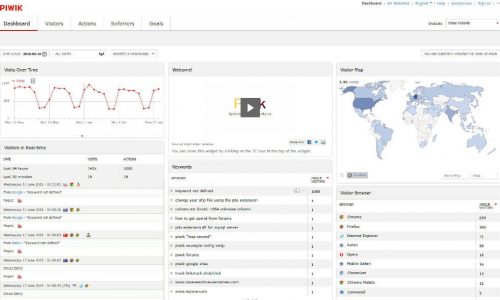
Piwik is an open-source alternative to Google Analytics which provides useful stats about who visits your website. It's biggest selling point, funny since its free!, is that your stats & data are kept private and isn't accessible by the corporate behemoth known as Google. If you don't really care about keeping that info private, then Google Analytics will probably save you some time and effort. For those of you like me who are a tiny bit paranoid and love learning and using free software, keep reading.
There's a Demo site available if you'd like to try it out first.
Prerequisites
- Ubuntu 15.04
- LAMP (Linux, Apache, MySQL & PHP)
- Apps: Unzip, Gunzip, Wget, Nano
*TIP: If you perform a fresh install of Ubuntu Server 15.04, you can choose LAMP as one of the services to be installed. If you already have an Ubuntu machine up and running, you can always install the packages individually after the fact. Liberian Geek & Unixmen have nice guides on LAMP installs if you need help.
Installation
Create a New Site
sudo mkdir /var/www/piwik
*NOTE: You have the option to install Piwik in a subdirectory of the site you want to monitor, but it's best practice to create a new site and database separate from all other sites. This prevents potential exploits from affecting Piwik and vice-versa. I'll be doing the latter in this guide.
Create the Apache Config
sudo nano /etc/apache2/sites-available/piwik.yourdomain.com.conf
Paste the following into piwik.yourdomain.com.conf and Save
<VirtualHost *:80>
	ServerName piwik.yourdomain.com
	DocumentRoot /var/www/piwik
	DirectoryIndex index.php index.html
	ErrorLog /var/log/apache2/piwik-error.log
	TransferLog /var/log/apache2/piwik-access.log

	<Directory /var/www/piwik>
		Options FollowSymLinks
		Options -Indexes
		AllowOverride All
		Order allow,deny
		Allow from all
	</Directory>

</VirtualHost>
*NOTE: Make sure to replace the yourdomain.com portion of the ServerName setting with your actual Domain Name. Also, while the config in its current state leaves the site wide open, don't fret, we'll be restricting access later in this guide.
Create a New Database
Enter your MySQL Root password when prompted
mysql -u root -p
Create a new MySQL Database and Database Admin User
CREATE DATABASE piwik;
CREATE USER 'pwkadmin'@'localhost' IDENTIFIED BY 'password'
GRANT ALL PRIVILEGES ON piwik.* TO 'pwkadmin'@'localhost';
FLUSH PRIVILEGES;
exit
*TIP: Some versions of MySQL log all the commands entered in the MySQL Shell including that password you just added in plain text. While there are ways to enter hash passwords instead of plain text, the easiest thing to do is delete ~/.mysql_history in your Home directory after creating new users. MySQL in Ubuntu 15.04 doesn't seem to log Create User commands by default which is great.
Install Piwik
Grab the latest version of the Self-Hosted edition of Piwik
wget http://builds.piwik.org/piwik.zip
*UPDATE: There are major issues with the last 2 Piwik versions, 2.14.0 & 2.14.1. I would stick with 2.13.1 until all issues have been sorted out. Download version 2.13.1 here.
*UPDATE-7/22/15: Piwik just released an upgrade of their WordPress Plugin (WP-Piwik) which is compatible with their latest release, 2.14.1. It's now safe to install or upgrade to 2.14.1 if you're on an older version of Piwik. If you're a WordPress user, just make sure WP-Piwik is upgraded to at least version 1.0.3 before upgrading Piwik.
Unzip and Copy Piwik to the DocumentRoot directory
unzip piwik.zip
sudo cp -r piwik /var/www
Change permissions on the DocumentRoot directory
sudo chown -R www-data:www-data /var/www/piwik
Edit the PHP Config
Edit php.ini & Save
sudo nano /etc/php5/apache2/php.ini

Change
;always_populate_raw_post_data = -1

to
always_populate_raw_post_data = -1
*NOTE: This change is only needed with PHP 5.6 which ships with Ubuntu 15.04. This change is unnecessary in older versions of Ubuntu which use PHP 5.5.
Enable the Site
Enable the Piwik Site
sudo a2ensite piwik.yourdomain.com
Restart Apache
sudo systemctl restart apache2
Run the Setup Wizard
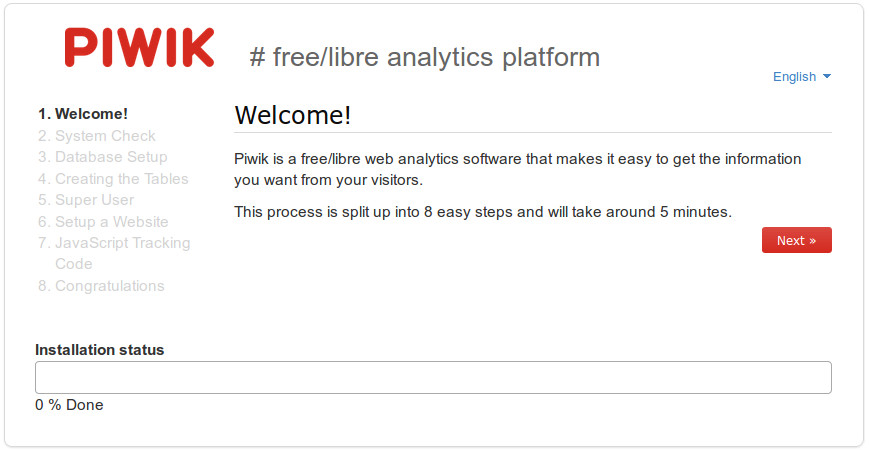
Browse to piwik.yourdomain.com and go through the Setup Wizard
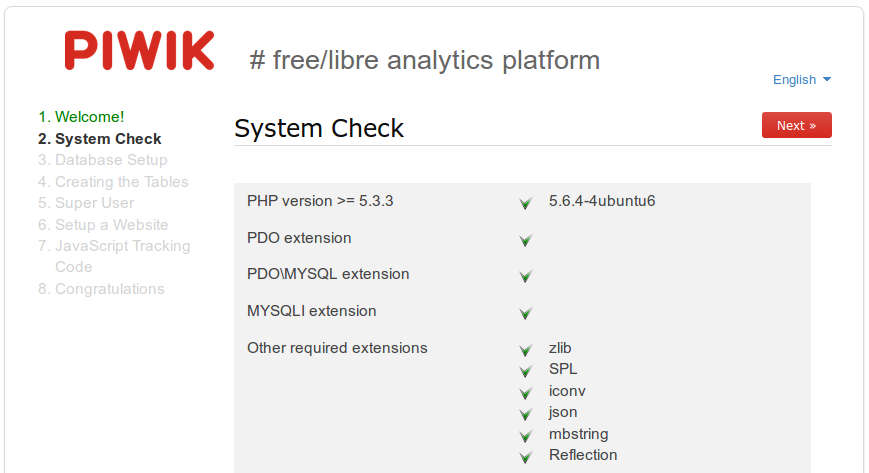
Make sure Piwik passes its System Check
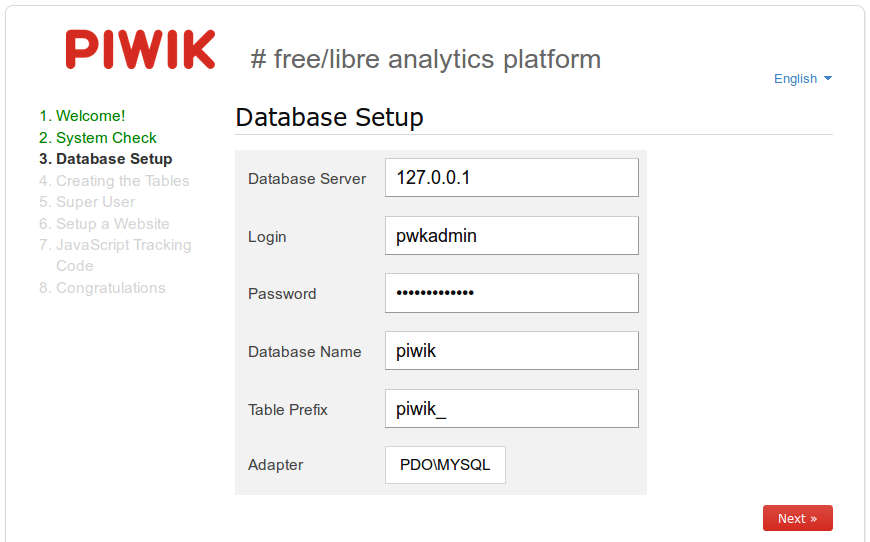
Enter the following settings and credentials for the MySQL Database we created earlier
Make sure the Database Tables were created successfully
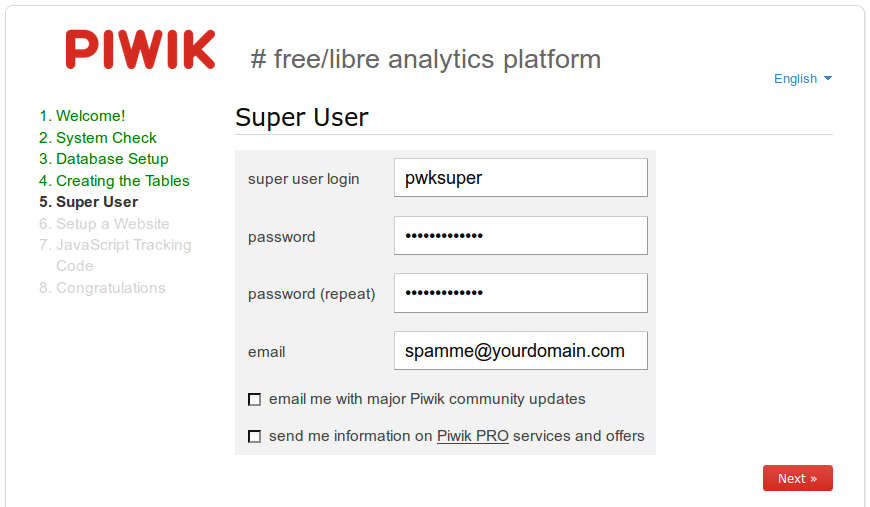
Enter credentials for a new Piwik Super User (aka Admin User)
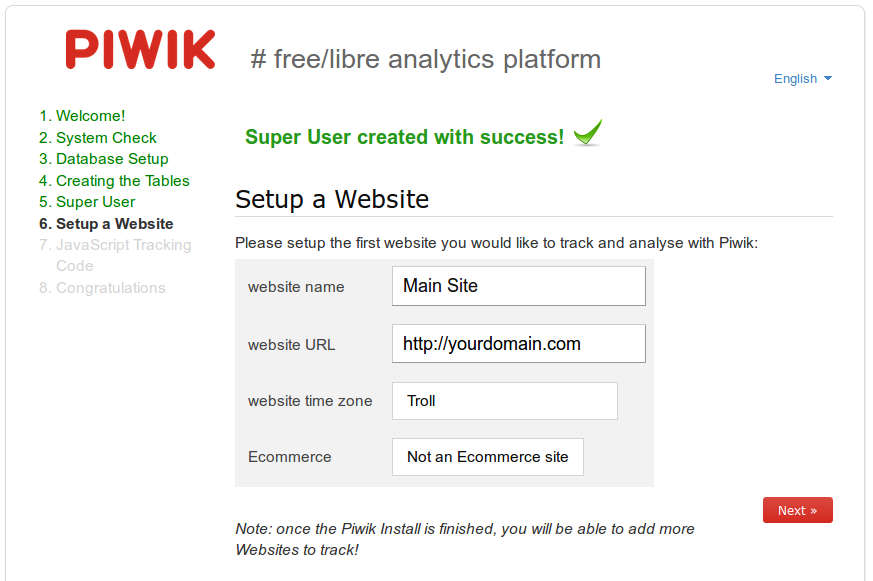
Enter info for the website you want Piwik to track
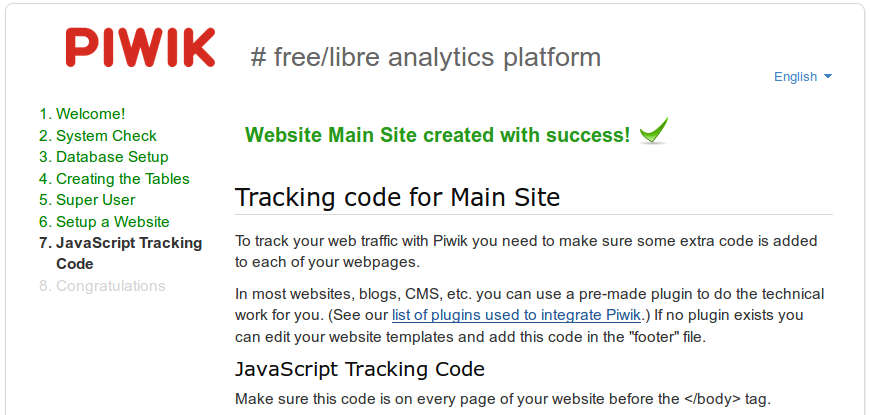
Skip the Javascript Page as we'll be using a Piwik plugin instead
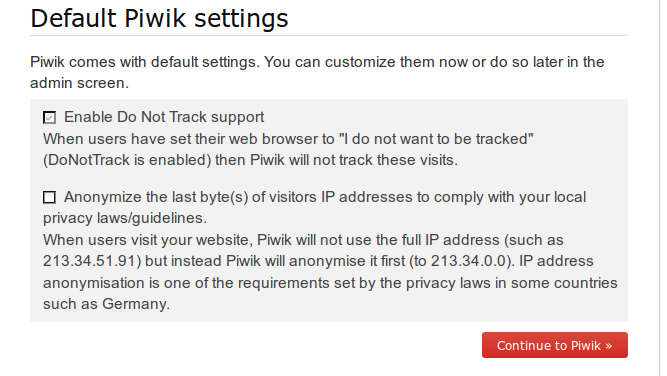
Uncheck the Anonymize setting if you want to see full IP addresses of your visitors and Complete the Setup Wizard
*NOTE: All of these settings can be changed on the Administration page in the Piwik site
Securing Piwik
If you only have remote access to your Piwik server, you should definitely implement SSL because the Piwik site requires you to login. You don't want everyone sniffing your username and password as you check your site stats from Starbucks. However, if you only intend to access your Piwik server locally or via VPN like me, you can forego SSL and restrict outside access to just 2 files, piwik.js & piwik.php
*NOTE: Even though I'm accessing my site via VPN, my credentials are still sniffable if someone has access to my local network. Bottomline is it's always safer to implement SSL when you host a site that has sensitive data.
Restrict Access
Create .htaccess in the DocumentRoot directory
sudo nano /var/www/piwik/.htaccess
Paste the following into /var/www/piwik/.htaccess
<Files "*">
    Order deny,allow
    Deny from all
    Allow from localhost
    Allow from 192.168.1.0/24
</Files>

<Files ~ "^piwik\.(js|php)|robots\.txt$">
    Allow from all
    Satisfy any
</Files>
*NOTE: This .htaccess config restricts site access to only the local server and the 192.168.1.0/24 subnet, but allows anyone to access piwik.js and piwik.php. These 2 files must be accessible from the internet for Piwik to successfully track visitors to your sites. You can modify the config to reflect your local subnet or individual IP's if so desired.
Change permissions of .htaccess
sudo chown www-data:www-data /var/www/piwik/.htaccess
sudo chmod 644 /var/www/piwik/.htaccess
Implementing Piwik
The last stop on our tour involves implementing Piwik on the site we want to track. There's a variety of Piwik plugins that work with different hosting platforms. These plugins save you the hassle of implementing the Piwik javascript you saw at the end of the Setup Wizard. I'll walk you through integrating Piwik with a WordPress site.
Locate your Piwik Auth Token
Login to your Piwik Admin site and in the top right-hand corner click on Administration ➞ Users
Click on your Piwik user account and copy your Token_Auth
*TIP: If you are tracking multiple sites and want to give people access to only view their site statistics, you can create multiple users with different AuthTokens and restrict what they see on the Piwik Admin site.
Install the WP-Piwik Plugin
Login to your WordPress Admin site, go to Plugins ➞ Add New and search for WP-Piwik
Install and activate the WP-Piwik Plugin
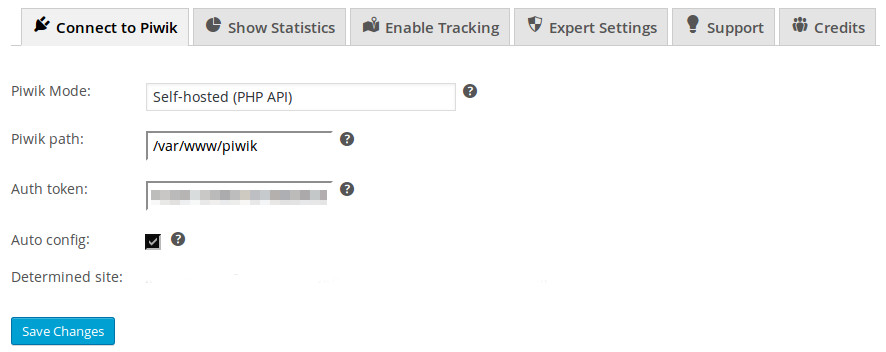
Configure the WP-Piwik Plugin
Go to Settings ➞ WP-Piwik, put in the following info and Save
- Piwik Mode: Self-hosted (PHP API)
- Piwik Path: /var/www/piwik
- Auth Token: Token_Auth copied in previous step from Piwik Site
*NOTE: My Piwik site is hosted on the same server as my WordPress site. If your Piwik site is hosted on a completely separate server, select Self-hosted (HTTP API, default) and enter the URL of your Piwik site instead.
Enable Tracking
Click on the Enable Tracking tab, select Default tracking and Save
*NOTE: After selecting Default tracking, your Piwik tracking code will be imported automatically. If you manage multiple sites, you'll need to manually enter the code to change the site ID that gets tracked. The code can be found on the Piwik Admin site under Administration ➞ Websites ➞ View tracking code
Bonus Section: Geolocation (IP Location Mapping)
One of the coolest things about Piwik is being able to see where people are viewing your site from. Don't you want to know where in the world is Carmen Sandiego...viewing your site from? It takes a tiny bit of effort to get this working, but to me its well worth it.
Download the GeoLite City Database
Login to your Piwik Admin site and in the top right-hand corner click on Administration ➞ Geolocation
Copy the GeoLite City database Download link
Login to your Piwik Ubuntu server and Download the GeoLite City database
wget http://geolite.maxmind.com/download/geoip/database/GeoLiteCity.dat.gz
Install the GeoLite City Database
Extract and Copy the GeoLite City database to the Piwik misc directory
gunzip GeoLiteCity.dat.gz
sudo cp GeoLiteCity.dat /var/www/piwik/misc
Rename the GeoLite City Database
sudo mv /var/www/piwik/misc/GeoLiteCity.dat /var/www/piwik/misc/GeoIPCity.dat
Change permissions on the GeoLite City Database
sudo chown www-data:www-data /var/www/piwik/misc/GeoIPCity.dat
Activate GeoLite City in Piwik
Close and Reopen your browser, login to your Piwik Admin site and go back to Administration ➞ Geolocation
You should now see GeoIP (Php) as Installed. Just Select it and you're all set.
Final Words
Well, now you should have a working Piwik site that allows you to track the who, when & where of those that visit your site. For businesses, this can provide valuable info on the demographic of your customer base and for casual bloggers, maybe you'll find out your site is huge in some faraway land like Antarctica. Penguins have a surprising amount of free time when they egg sit. Anyway, I hope this guide was useful to you and feel free to comment. Catch you laters!







 :
:  :
: