If you run WordPress, it's a good idea to have some type of security software to protect against the endless attacks waged against your precious websites. One of the most popular security plugins available to mitigate this onslaught is Wordfence.
Wordfence is a free security plugin that offers a lot of features to protect your site, one of which is called Firewall Optimization which ensures that the Wordfence plugin runs before any other software loads on your site. It enforces this behavior through a PHP setting called auto_prepend_file which points to a Wordfence php file (wordfence-waf.php) located in the root directory of your site. If this file is ever missing, moved or renamed, your site will flat-out fail to load.
While it's generally a good idea to enable this setting, there are some things you should be aware of if you ever need to move or clone your site to a new server or root directory. This scenario most often comes into play when cloning your production site to a development environment. If you are running NGINX as your underlying web server, follow this guide to make the process as smooth as possible.
Synopsis
The "Recommended" Way
Disabling Wordfence Firewall Optimization
If you're ready to move or clone your site to a new root directory or server, you'll first want to take the step of disabling Wordfence Firewall Optimization which can be done through your WordPress dashboard.
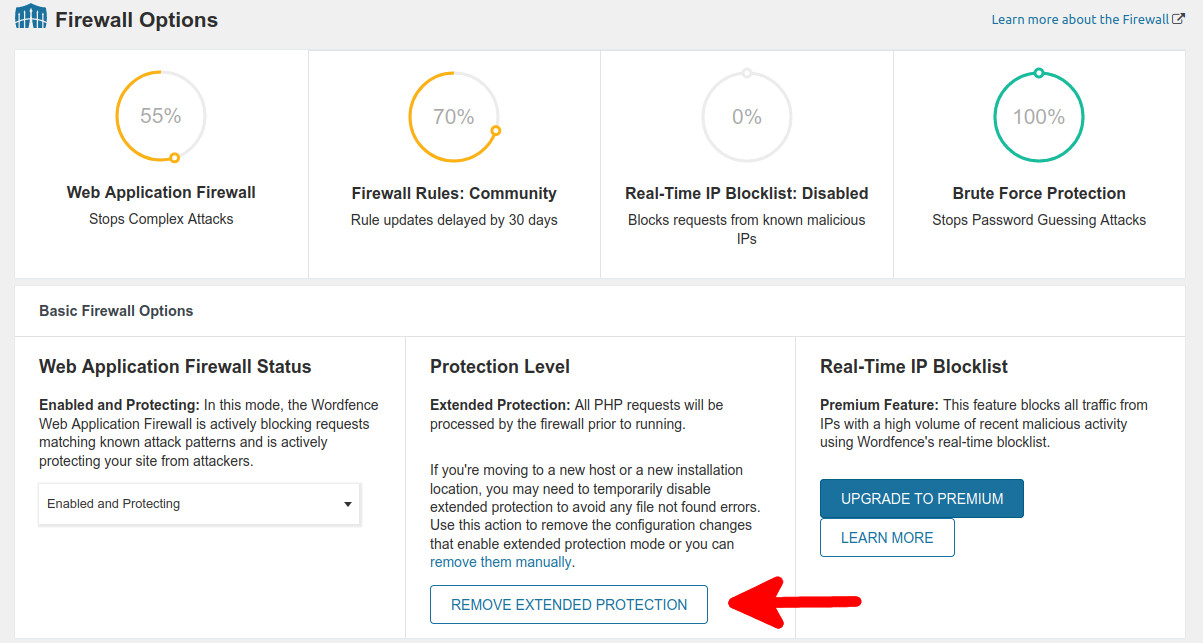
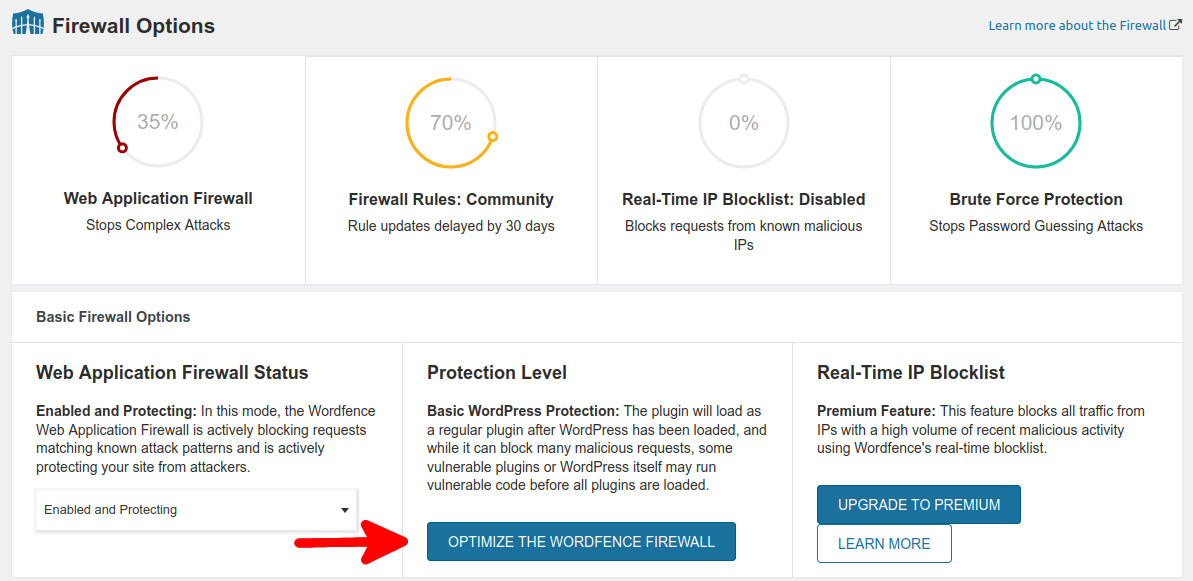
In the WordPress Dashboard menu, go to Wordfence -> Firewall, then select All Firewall Options in the main window.

Next click Remove Extended Protection to disable Firewall Optimization.
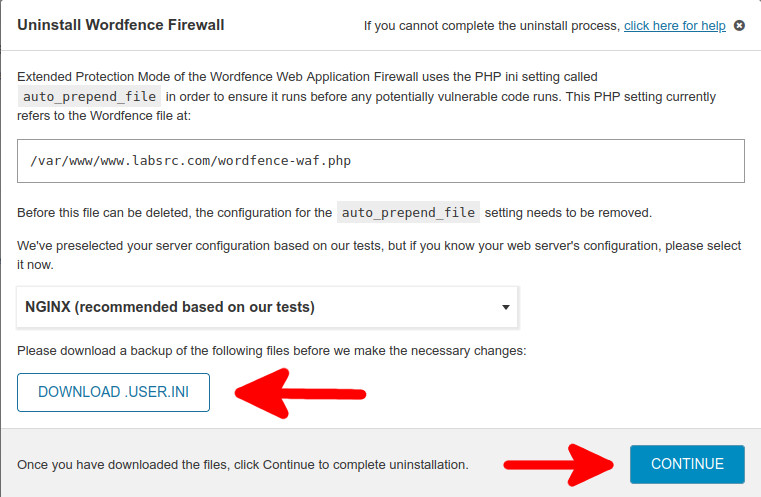
You'll then be prompted to download a backup of the .user.ini file which contains the auto_prepend_file setting mentioned earlier in the guide. After downloading the file, you can then click Continue.
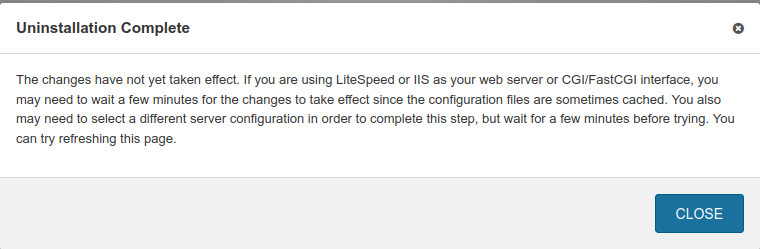
After a few minutes you'll see the following confirmation that the process has completed along with a key warning that the change will not take effect until your site cache is cleared. If you're running NGINX, this is a warning you need to heed.
Clearing NGINX Cache
The vast majority of NGINX servers use PHP-FPM (FastCGI Process Manager) to speed up site delivery. Because of this, we'll need to restart the PHP-FPM service to make sure the Wordfence Firewall Optimization setting is truly disabled.
On an Debian based system, like Ubuntu, run the following command to restart PHP-FPM.
sudo systemctl restart php7.4-fpm
*NOTE: If you're running a different version of PHP, change the version number before running the command. For example, PHP 8.0 uses php8.0-fpm instead.
If you use other site caching utilites on top of PHP-FPM, it would be a good idea to clear those as well. With all that done, you can now safely clone your site using whichever backup method you prefer.
*TIP: If you've never cloned your WordPress site before, I highly recommend using the WordPress plugin Duplicator which makes a backup of your website as well as its database and streamlines the cloning process.
Re-enable Wordfence Firewall Optimization
After making a backup of your site, re-enable Firewall Optimization, by going back to All Firewall Options in the WordPress Dashboard menu under Wordfence -> Firewall.
Then click on Optimize the Wordfence Firewall.
You'll be prompted to download a copy of the .user.ini file again which should be blank. Once done, click Continue.
After receiving confirmation of completion, restart PHP-FPM one more time.
sudo systemctl restart php7.4-fpm
Your WordPress site should now be back up and running with Wordfence Firewall Optimization enabled.
The "Riskier" Way
What if you've already made a backup of your site and forgot to disable Firewall Optimization first? Well, the short answer is you'll be presented with a nice blank white screen when you try to load your cloned site. Don't fret though, you can still disable Wordfence's Firewall Optimization without access to the WordPress Dashboard as long as you have access to the root directory of your site.
In the root directory of your cloned site, rename the .user.ini file to .user.ini.orig.
sudo mv /var/www/cloned-site/.user.ini /var/www/cloned-site/.user.ini.orig
*NOTE: If you don't have console access to your server, you can always FTP to your site to manually rename the .user.ini file.
Now restart the PHP-FPM service to make sure the change takes effect.
sudo systemctl restart php7.4-fpm
You'll now be able to access your cloned site and re-enable Wordfence Firewall Optimization through the WordPress Dashboard if you so choose.
I know the "Riskier" way looks a lot easier than the "Recommended" way, but anytime you manually touch files in your site's root directory, you run the risk of breaking something or in this case, breaking more things.
 :
: