

Google "Family Computer"
and everyone looks like this
Synopsis
Backstory
I recently built a computer for my sister to replace an aging HP Pavilion she bought from a chain store around 6 years ago. Her old computer had become bogged down with viruses/adware/spyware and every other kind of ware imaginable. I was able to clean out most of the crap that had accumulated on her machine, but after doing an analysis of the installed hardware, I deemed the computer not worthy of an upgrade. After letting her know the prognosis, she told me that she was ready to invest in a new PC.
After asking what she and her family use their computer for and got the generic answer of work and surfing the Internet, I asked the key question which is would her kids be playing any games on this new PC. She told me, "No, they have enough consoles and video games to last them til the next millennium." This gave me a good starting point although she did add that if its not fast, her kids wouldn't use it. As for budget, she was used to buying those cheap computer bundles so I aimed my budget at around $300-$400. For people who live on the mainland this is more than doable, but when you live in the middle of the Pacific, shipping can singlehandedly destroy any budget. I can recall numerous times trying to buy a $5 part online only to be met with a $40 shipping charge upon checkout. Can't drones fly over oceans yet? Anyway, even with this major obstacle ahead of me I started my quest to build a fast yet budget-friendly Family PC.
Picking Components
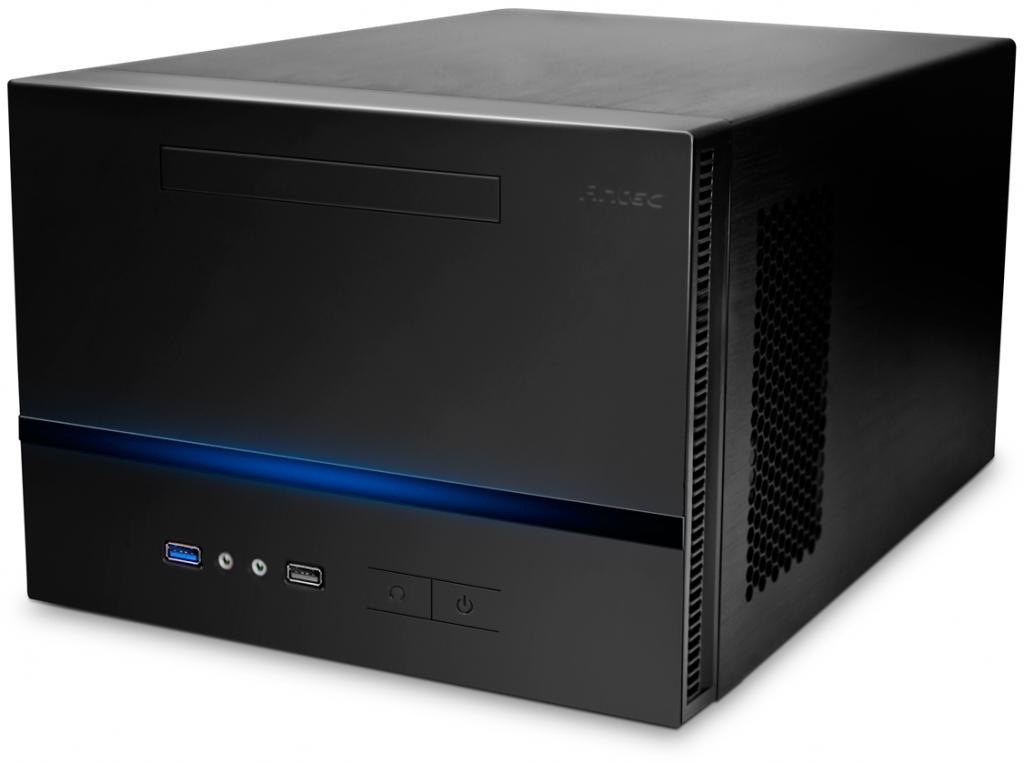
The Case
Most people begin a build by deciding on a CPU and motherboard or sometimes even a GPU, but I started by asking my sister what kind of case she wanted. My reasoning behind this is that form factor plays the biggest, well...factor when putting together a build. Was she fine with the standard mid-tower or was she looking to save a some space and spend a little more on a compact case? After showing her some common case designs she decided on what I like to call the long cube. I originally opted for the Cooler Master Elite 130. It's a Mini-ITX case that is compact and cheap, but can hold a lot of drives and a fairly big GPU. The GPU wouldn't be a factor in this build as I would be using integrated graphics, but it's always good to have the option down the road. Unfortunately, because my sister took so long deciding and again because I live in Hawaii, shipping costs and availability became an issue and I had to go with the Antec ISK600. Both cases are similar in size and shape with the biggest difference being the ISK600 can only fit a Slim Optical Drive whereas the Elite 130 has room for a full-size 5.25" drive. More on this later.
CPU & Mobo
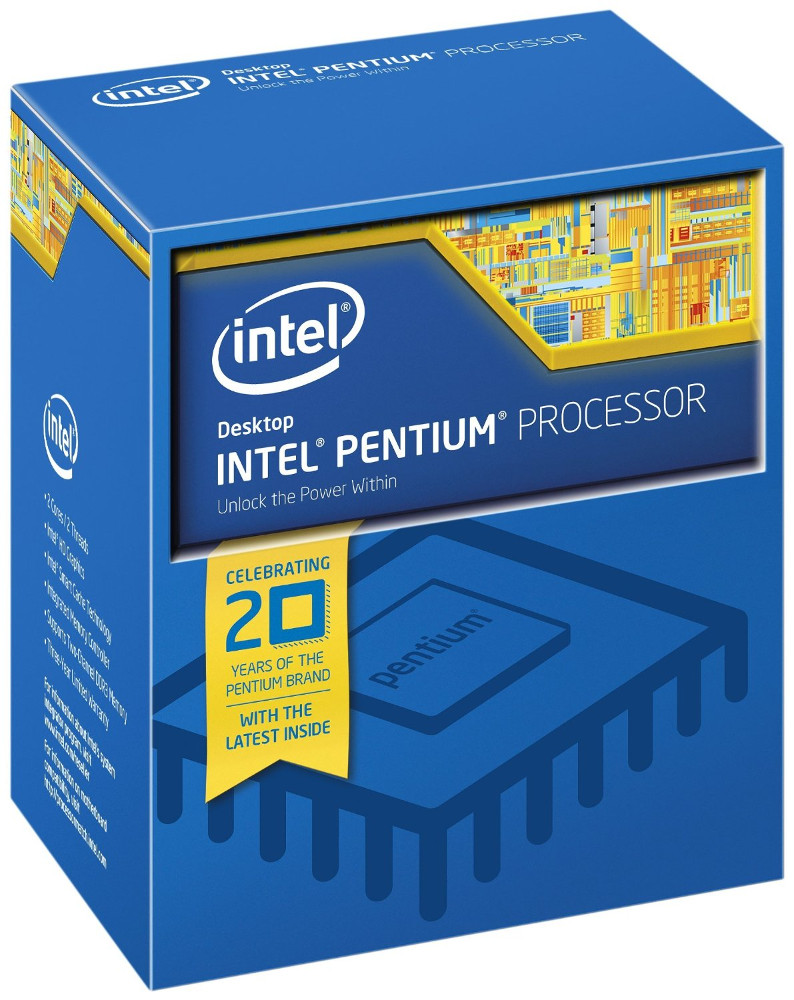
Once I had the form factor figured out, I could now move onto the CPU and motherboard combo. I started with the CPU and settled on the Intel Pentium G3258. Even though this CPU is only a dual-core with no Hyperthreading, it is a favorite among budget builders for its ability to be easily overclocked to 4.0Ghz even with it's stock heatsink on non-Z motherboards. For those who haven't delved into the overclocking world, modern overclockable Intel CPU's usually require a motherboard with a Z series chipset to be overclocked, e.g. Z87, Z97, Z170. These Z-series motherboards come at a premium price and for a lot of people just aren't worth it. The Pentium G3258 bucked this trend and motherboard makers added the ability to overclock this budget CPU on some of their budget series boards.
The motherboard I chose was the ASRock B85M-ITX. I could of saved a few bucks by purchasing an H81 series board and still gotten the ability to overclock, but the B85 chipset provides more SATA3 and USB 3.0 ports as well as PCIe 3.0 slots rather than PCIe 2.0. Since my sister was going to keep this computer for a few years, this gives her a little more breathing room as far as future upgrades go.

RAM
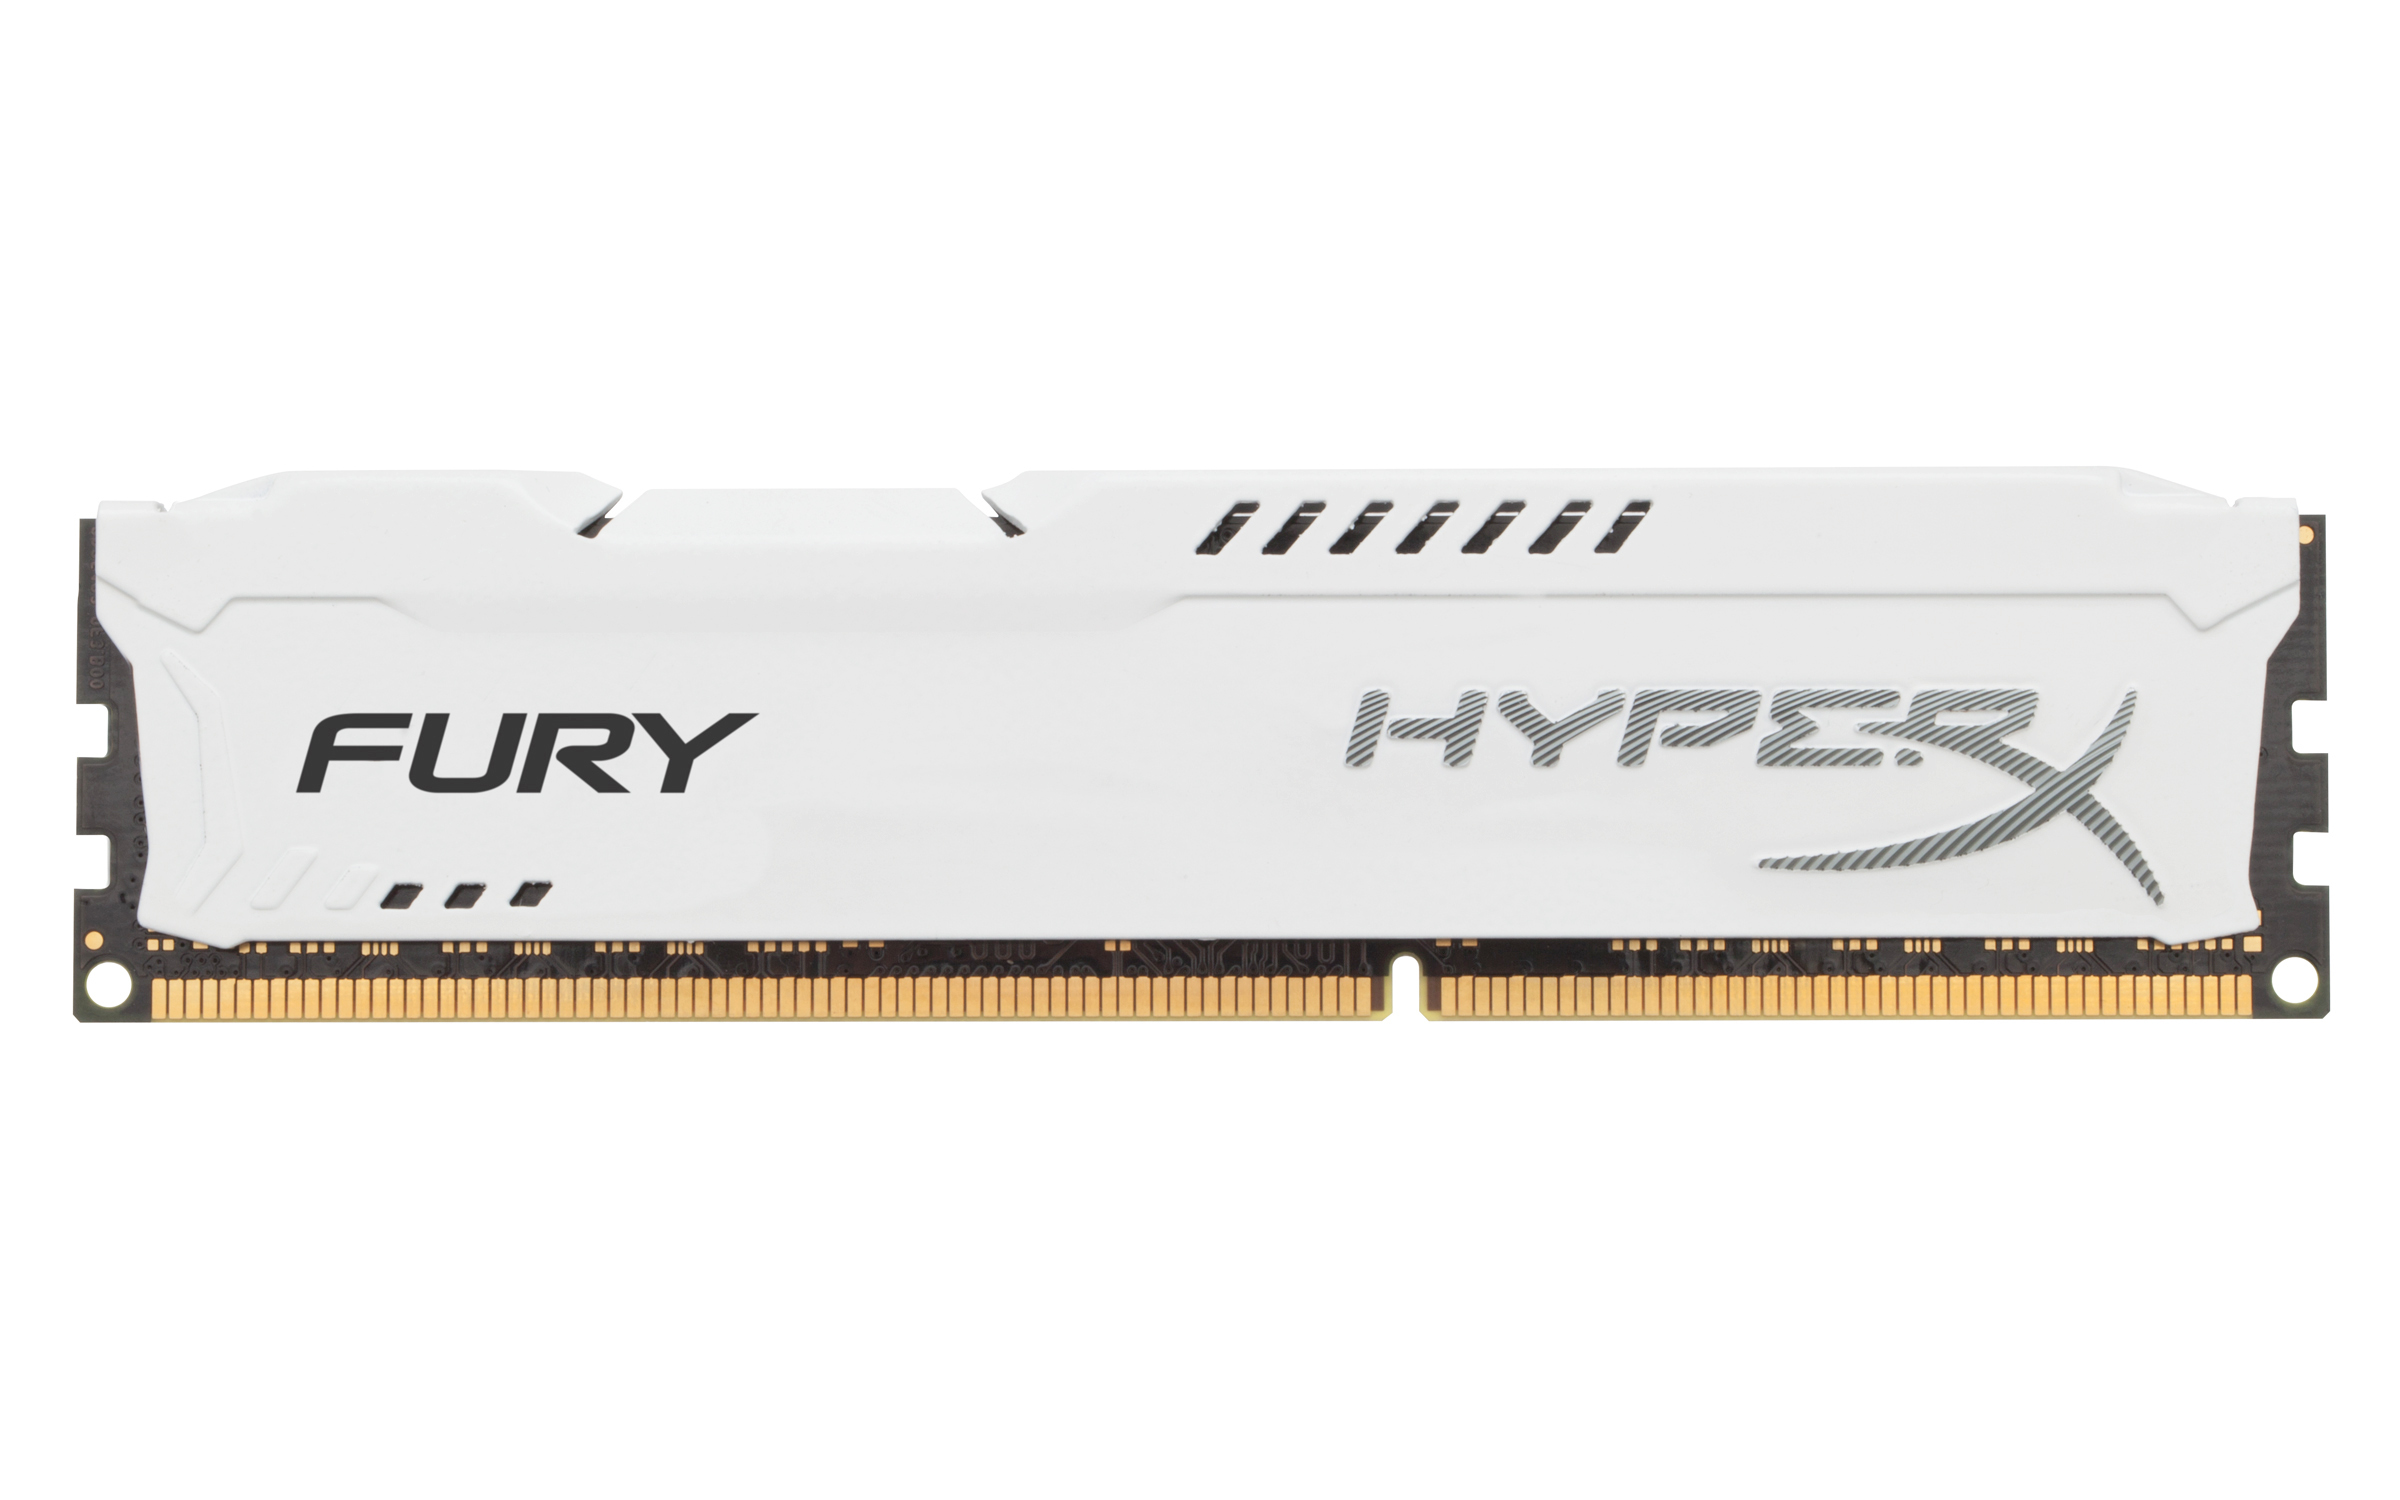
For RAM I went with a single stick of 8GB Kingston HyperX Fury 1600Mhz DDR3 memory. Most people would've chosen two 4GB sticks to enable dual-channel, but real world tests have shown that the performance gains of dual, triple and even quad channel memory configurations are pretty minuscule. Buying 1 larger stick of RAM today gives you the flexability to increase your memory later on by buying a second matching stick instead of having to purchase 2 larger sticks. If your motherboard has 4 RAM slots this isn't a big concern, but pretty much all Mini-ITX boards only come with 2 RAM slots.
Storage
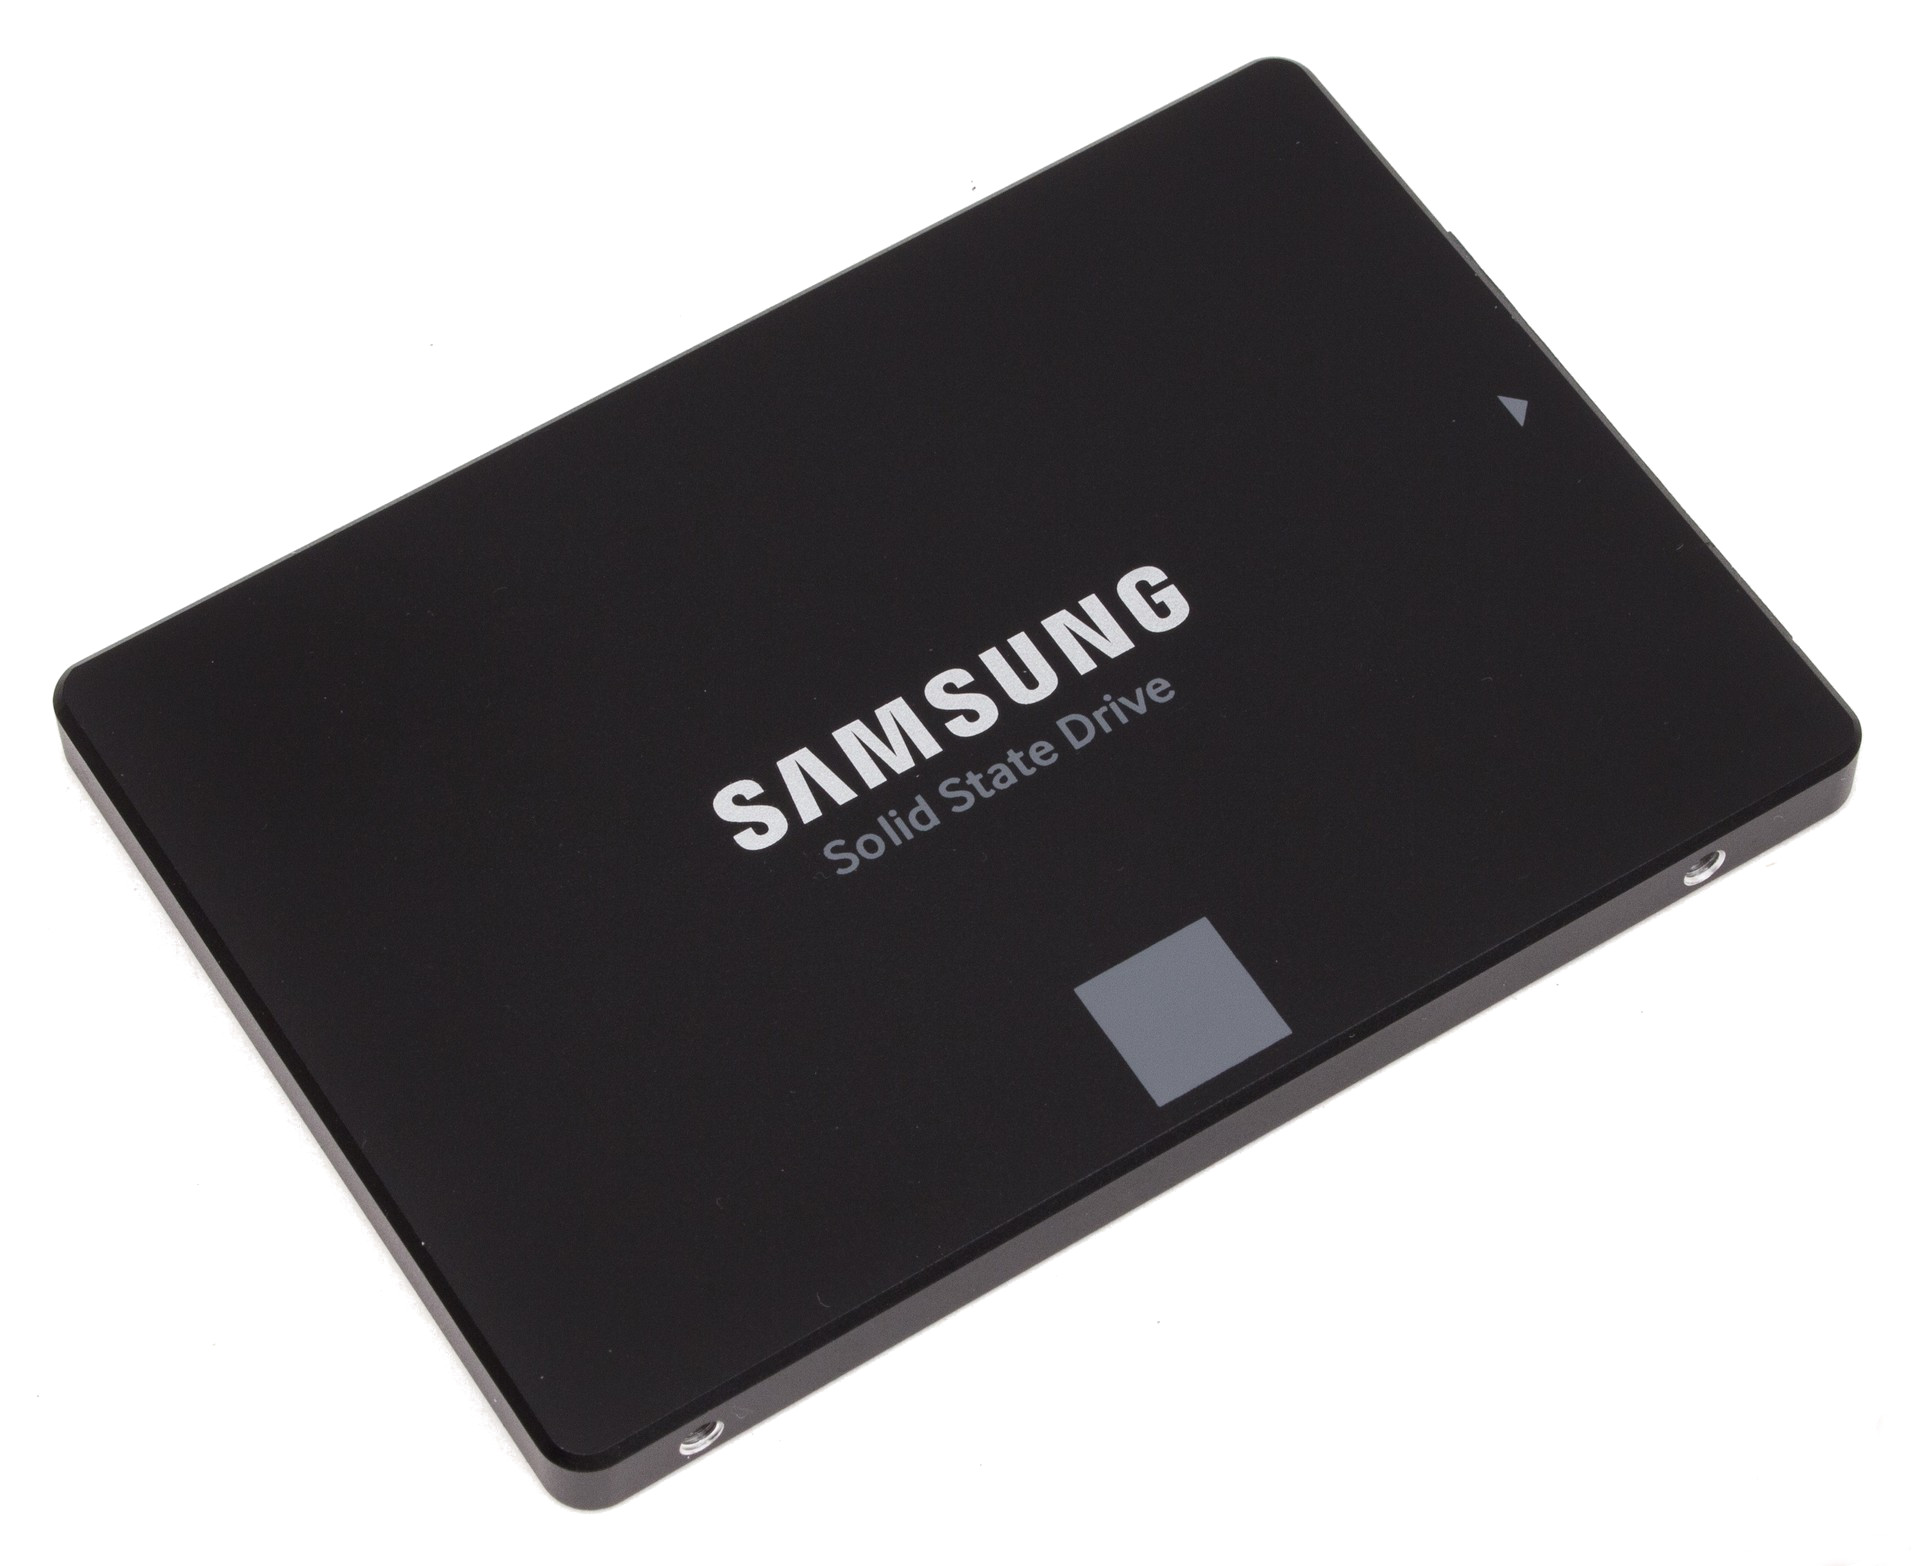
The component that has the biggest influence on day to day performance is your storage device. Once my sister said she wanted a "Fast" PC, there was no doubt in my mind that I would be purchasing an SSD over a larger mechanical hard drive as her main storage device. By now, most people have heard the accolades of SSD's, but I can tell you from firsthand experience that nothing can breath new life into an old computer like a solid SSD. Her old PC was loaded with about 200GB of pictures and videos along with the aforementioned plethora of viruses and adware so I went with the budget minded, but still solid performing Samsung 850 EVO 250GB SSD. SSD's are still quite a bit more expensive than standard mechanical hard drives so most people opt for a smaller SSD as their main drive while supplementing it with a cheaper, larger mechanical drive to store media and files on. In my sister's case, the single 250GB SSD should hold her over for awhile.
Power Supply
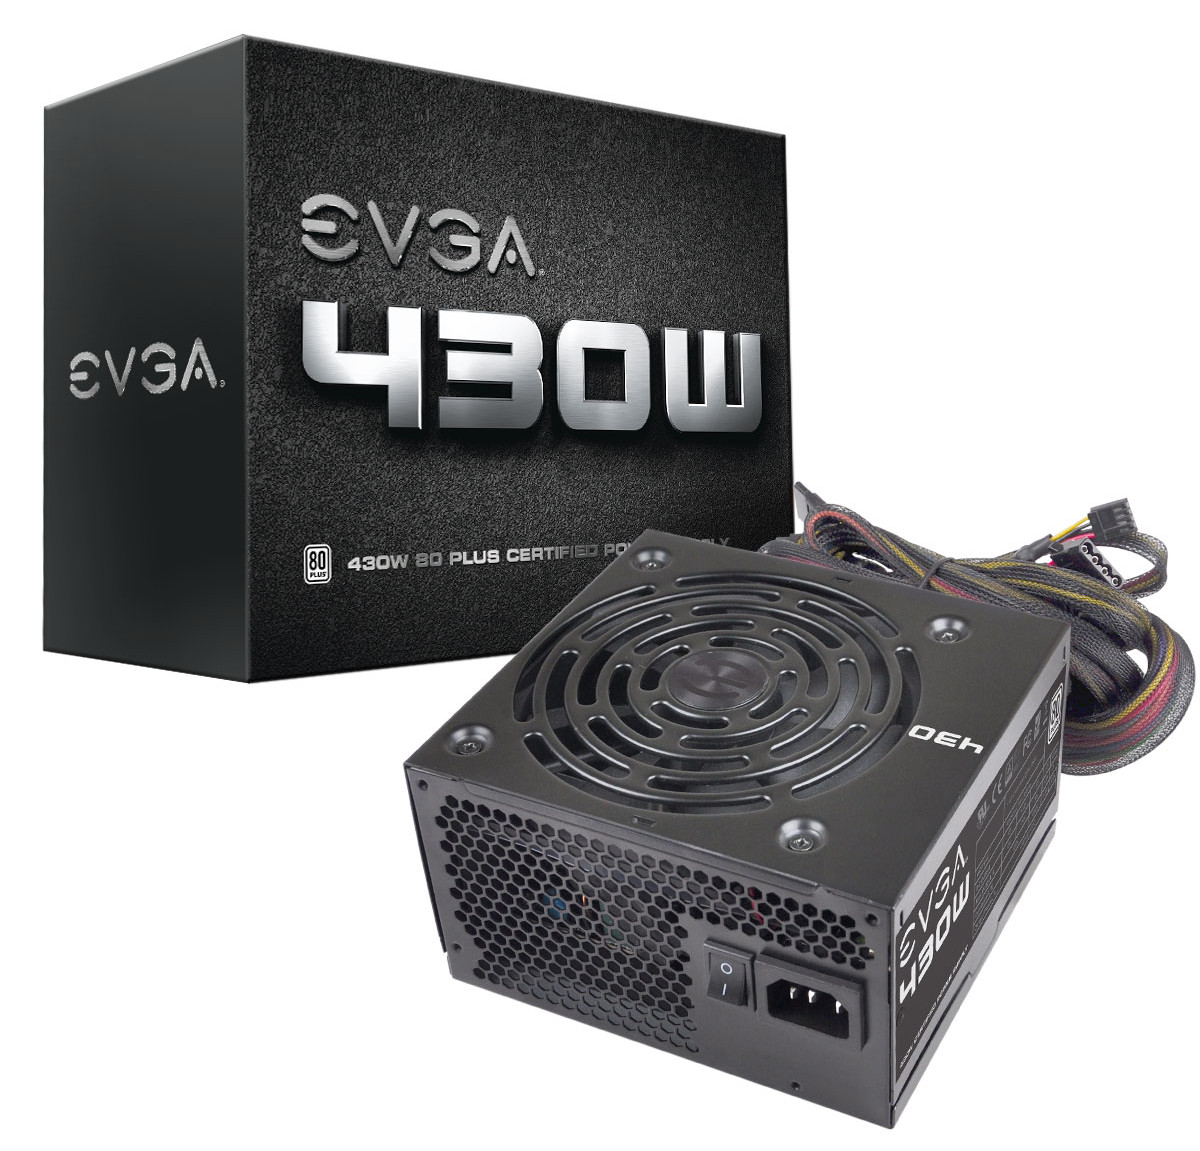
While the other components I talked about usually get the most attention, the most overlooked part of a budget build is usually the power supply. There are a ton of power supplies on the market with multiple power ratings, capacities and connector options. While most people look to save money by getting a cheap power supply or potentially buying a case with an included power supply, I would highly suggest doing your homework before making your purchase. I won't go in-depth into what to look for in a power supply, but I would warn you that the power supply is the one component in your system that can actually kill other components. While it may be tempting to get a generic power supply for that bargain basement deal-of-the-day price, I would instead recommend buying a well rated power supply from a reputable manufacturer with a decent warranty. A solid power supply may cost a little more, but I guarantee you'll save yourself a lot of headaches staying away from the Super-Good-Magic 1000W power supply for $10. In my sister's build, I went with a pretty affordable EVGA 430W 80 Plus rated power supply. I would've liked to get a modular or semi-modular power supply due to the space restrictions in the Antec ISK600, but I wasn't able find a good enough deal at the time.
Build List
Here is a rundown of the build excluding the shipping cost to Hawaii which the rest of you landlocked Americans hopefully don't have to worry about. Alaska knows what I'm talking about. We're states too dammit.
Budget Family PC Build |
||
|---|---|---|
| Component | Product | Price |
| Case | Antec ISK600 | $60.40 |
| CPU | Intel Pentium G3258 | $59.99 |
| Motherboard | ASRock B85M-ITX | $59.99 |
| RAM | Kingston HyperX Fury 8GB 1600Mhz DDR3 | $38.49 |
| Storage | Samsung 850 EVO 250GB SSD | $79.99 |
| Power Supply | EVGA 430W 80 Plus | $32.74 |
| Grand Total | $331.60 | |
Optional Components
Slim Optical Drive
For those of you who still have the need for a DVD drive, the ISK600 doesn't include a full size 5.25" bay, but as mentioned earlier, does have room for a Slim Optical Drive. You'll commonly see these drives in laptops or Ultra Slim PC's. You can pick up a Samsung Slim SN208FB DVD Burner, but you'll also need to purchase a Slimline SATA to SATA adapter as well. The standard SATA power connectors don't fit these drives. Both of these components will set you back another $27.
Video Card
The integrated GPU included with the Pentium G3258 is more than capable of handling basic flash games or watching HD videos, but if you feel the need for something a bit beefier that can handle modern games, I highly suggest getting an Nvidia GTX 950. This card gives you great performance at a decent price and has very low power requirements. You can get pick up an EVGA GTX 950 SC which is a dual-slot, single fan card that only requires a single 6-pin power connector and a 350W Power Supply for around $160. It's also only 6.8" long so it's perfect for a compact case like the ISK600. I'm using this card in another compact build and am thoroughly impressed with it.
Overclocking Tips/Warning
Overclocking the Pentium G3258 will vary from board to board and even chip to chip, but overall the process is fairly easy and doesn't require a 3rd-party heatsink to hit 4.0Ghz. The one huge issue you may face will only affect you if you decide to run Windows 10.
If you decide to upgrade to or install Windows 10 while running a G3258, you may need to disable all overclocking settings as well as disable the second core for the installation to complete. At this point you may be freaking out and saying whats the point of buying this CPU if I have to run it stock with just a single core. Well this change is just temporary to get Windows 10 installed. Once you complete the installation, you will need to change permissions and rename a file called mcupdate_GenuineIntel.dll in C:\Windows\system32. Once this file is renamed, you can reboot and re-enable all cores as well as any overclocking settings.
Follow this link for a complete walkthrough:
G3258 Windows 10 Overclock Fix
If you decide to buy a non-Z ASRock motherboard there may be an additional step to allow overclocking. If you purchased the B85M-ITX or a similar ASRock motherboard and are already running the latest BIOS version 2.40, you won't need to go through all those steps to get Windows 10 installed, but all of the overclocking settings will be missing from the BIOS. The good news is that once you have Windows 10 installed, you can downgrade your BIOS version to 2.30 and all of those beautiful settings will be back. Do keep in mind that if you ever need to reinstall Windows 10, you'll need to go through all of the steps above for the installation to complete.
You may be thinking that all of this isn't worth the hassle, but the performance gains and the fact that ASRock simplified the overclocking process to just one simple BIOS setting definitely makes it worth the effort.
Build Tips
Tip #1
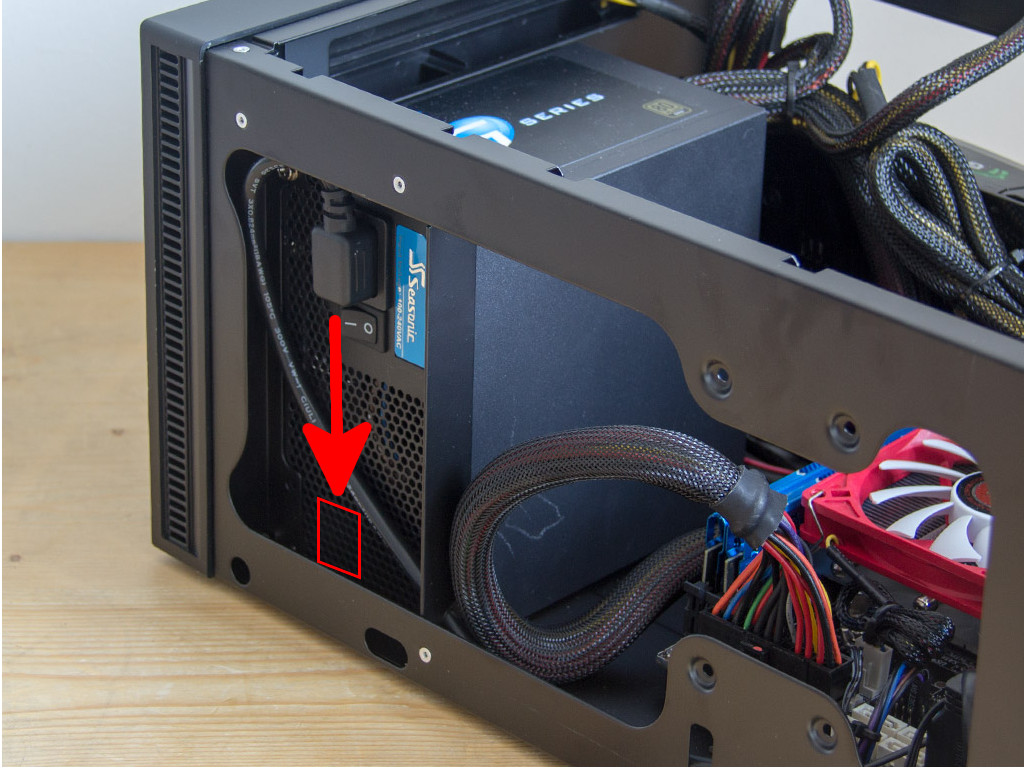
Overall this build went pretty well although there were a couple issues I ran into. The first was that the way my Power Supply was oriented, I either had to face the Power Supply with the fan facing the front of the case where there is very little airflow or flip it the way Antec intended with the fan facing the interior of the case, but have the power supply cable be scrunched and bent at the bottom of the case. I ended up scrunching the cable, but neither option was ideal. If you purchase a power supply with a different fan orientation you won't run into the same dilemma I had.
Tip #2
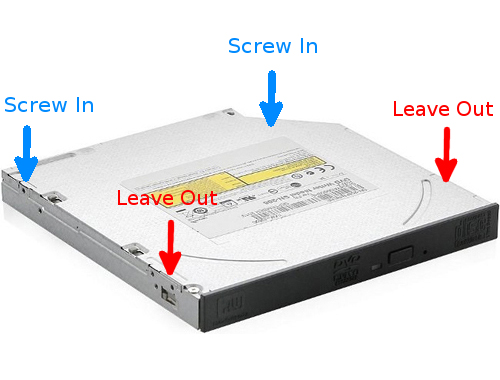
The second issue I faced was with the Slim DVD Drive. This is the first time I've installed a Slim DVD Drive as every other case I've owned had a full-size 5.25" bay. The Antec ISK600 provides mini screws I've never seen before in a PC build that secure the Slim DVD to a removable drive cage. After installing the drive, I noticed that the tray wouldn't eject. I thought the drive was defective as it came without any packaging and thrown in a big box by Amazon's crack packing staff. After returning the drive and getting a replacement, I decided to test the drive before installing it and it worked fine. Once mounted and installed to the removable drive cage however, the drive tray refused to eject. I initially thought that the front of the case was preventing the tray from ejecting cleanly, but after removing the drive cage with the drive still mounted the tray still refused to eject. By chance I removed a couple of the screws to see if I could adjust the drive's orientation and hopefully allow the drive to eject. This time the tray ejected without issue. At this point I realized that the screws provided by Antec were too long and were actually preventing the tray from ejecting properly. I decided to just leave the 2 screws closest to the front of the drive unmounted and rely on the back 2 screws to keep the drive in place. This has worked out for me so far with no further issues.
Final Words
Hope this guide helped you out or at the very least gave you a starting point for creating a budget build of your own. Again, if you're on the mainland I'm sure you can get a much better deal on parts than I can, but this build should give you a good balance of price and performance without sacrificing on reliability. If you have any comments or suggestions, feel free to comment below.
 :
:
test comment