There's not a whole lot of options for Linux when it comes to live, full-image backups. Even fewer when you're looking for something free and easy to use. Don't give up hope though, because you've stumbled upon the right guide and the right app.
Veeam is a software company that has made a name for itself in the world of virtual machines backups, but they've been offering free versions of their products for standalone desktops for years. I've been fairly happy with their free Windows product, so I decided to try out the Linux version as well.
Veeam Agent for Linux hasn't been around as long as the Windows variant, so there are still some features like email notification, that haven't been built in. Overall though, it's a solid application and I'll show you some workarounds to get past some of these limitations.
Synopsis
Register and Download Veeam Agent for Linux
Surf on over to the Veeam Downloads page and click on the Veeam Agent for Linux FREE download button. Make sure you click on the FREE version and not the commercial one.
At this point you'll be prompted to create a free Veeam account. Now I know nobody likes to register for websites, but this is the least you can do to get a free application that will protect your data for years to come. You can always opt out of their email advertisements so there's no real excuse not to.
After registering, you'll be redirected to a page where you'll be asked to specify your Linux distribution and architechture type. I'm an Ubuntu user so I went ahead and selected Debian/Ubuntu & 64-Bit. Go ahead and download the .deb file and save it to the Linux machine you plan to backup.
Installing Veeam
Now that .deb file you just downloaded isn't the actual application. It's actually the setup file for the Veeam repository which allows you to always stay up-to-date with the latest Veeam Agent for Linux version.
To setup the repository, run the following command.
sudo dpkg -i veeam-release-deb_1.0.7_amd64.deb
sudo apt update
Now that the repo is setup, we can go ahead and install Veeam.
sudo apt install veeam
Optional Packages
If you plan on backing up to a network share rather than a locally mounted drive, Veeam allows you to use either SMB or NFS. If you choose the former, you'll need to install the cifs-utils package.
sudo apt install cifs-utils
If your PC requires special drivers or is setup to only boot from UEFI media/devices, then you'll need to create a Custom Recovery ISO which requires the genisoimage package. I'll talk more on this point in the next step, but you can install it by doing the following.
sudo apt install genisoimage
Setting Up Veeam
Veeam Agent for Linux is a command-line only app so go ahead and open a terminal and run the following to start the setup.
sudo veeam
After the setup launches, accept the license terms, and click Next.
Creating a Custom Recovery ISO (Optional)
This step is optional as Veeam provides a bootable recovery ISO on their download page in case you ever need to recovery your PC via bare-metal restoration.
You should only need to create a custom recovery ISO if your PC requires special drivers for components like the hard drive controller, ethernet controller, etc., or you need the recovery ISO to be EFI compatible.
If you do fall under this category, select EFI system if applicable to your PC, select Download and patch ISO, then choose a directory to save the ISO to.
Veeam will automatically copy all currently loaded kernel modules to this custom recovery ISO.
Remember that you do need the genisoimage package installed to create the ISO as stated in the previous section.
Lastly you can enter a license file if you purchased the application, but for frugal people like me, just click Finish to activate the Free version.
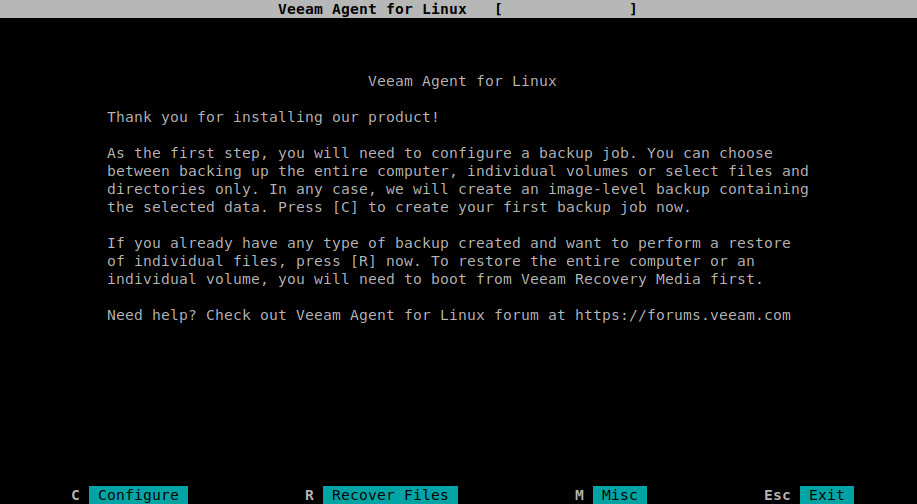
Once the initial setup is complete, you will be automatically redirecting to the home screen where we can configure backups.
Configuring Veeam Backups
At the home screen, press "C" to configure a new backup.
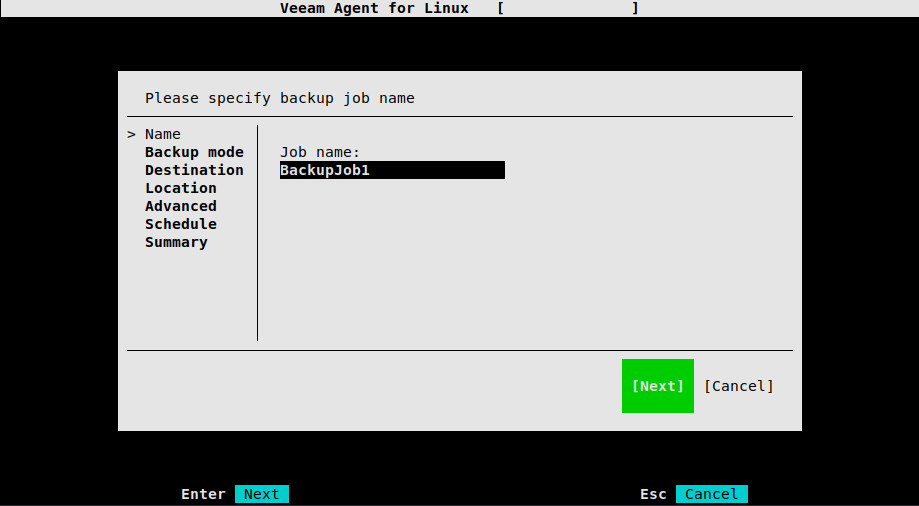
Enter a Name for your backup job.
Then select Entire Machine to take full image backups.
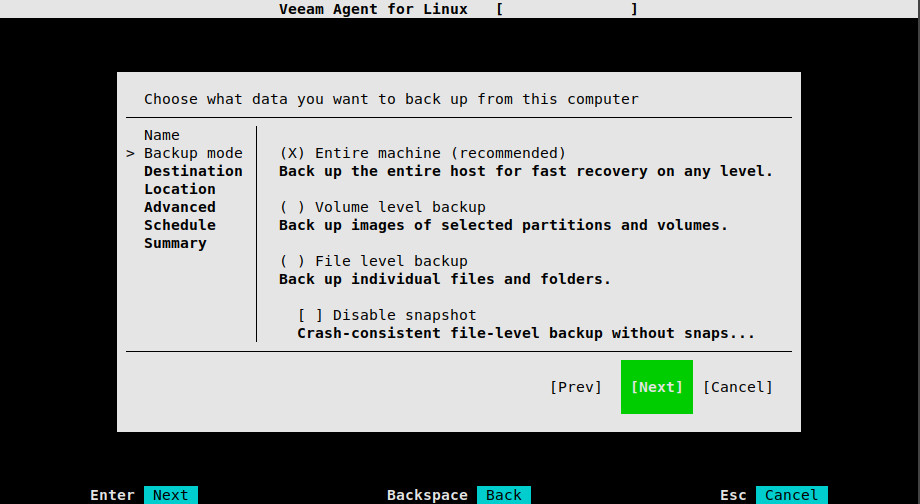
*NOTE: When selecting Entire Machine as the backup mode, Veeam is smart enough to only backup the drive your OS resides on. It will not include any externally mounted drives as part of the backup.
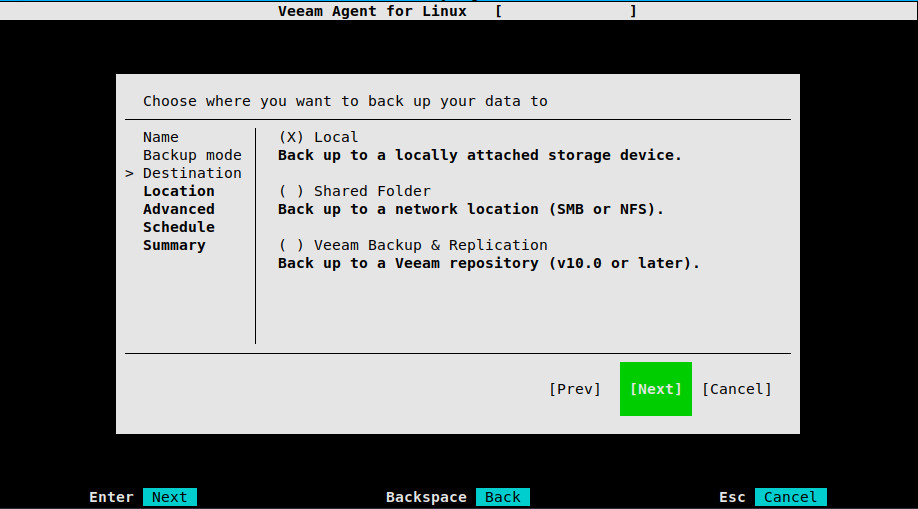
Next, select a destination for your backups. For simplicity's sake, we'll select Local.
Enter the Location of your backup drive and enter the number of Restore Points you'd like to retain.

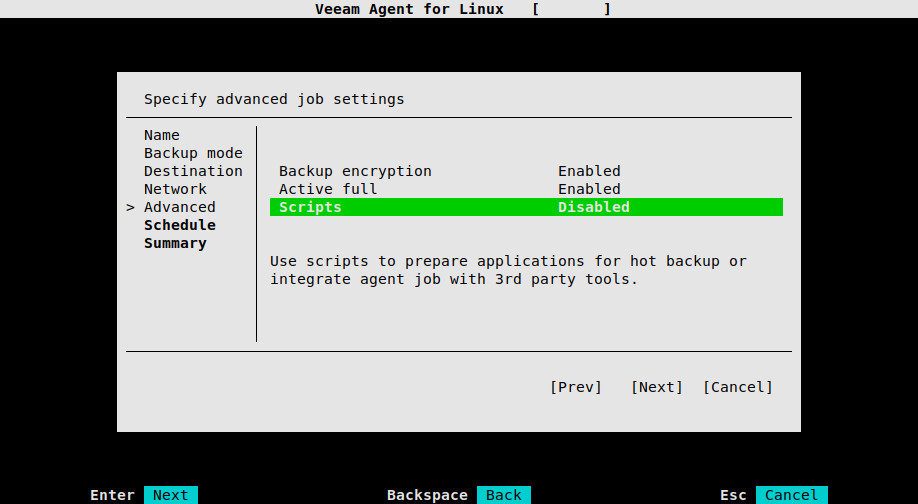
Advanced Settings
If you care even a tiny bit about security, you should definitely enable Backup encryption. All that's required is setting a password. Make sure to remember this password as you won't be able to restore any of your backups without it.
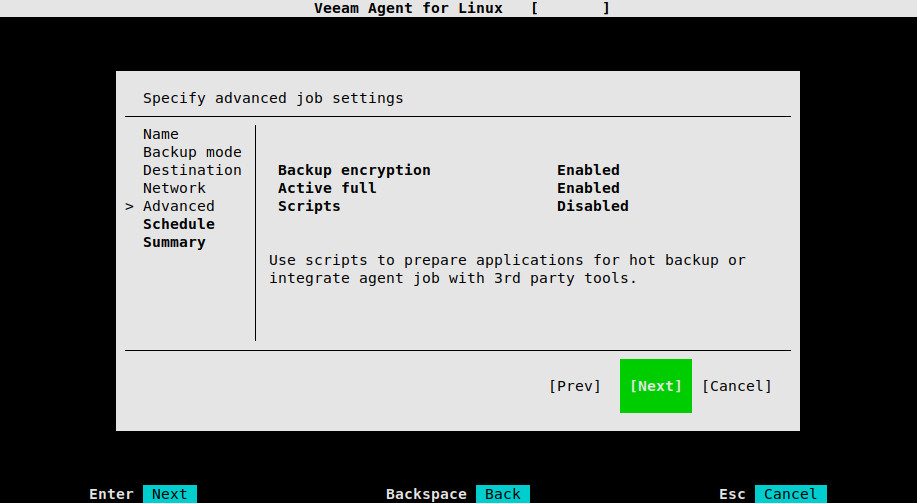
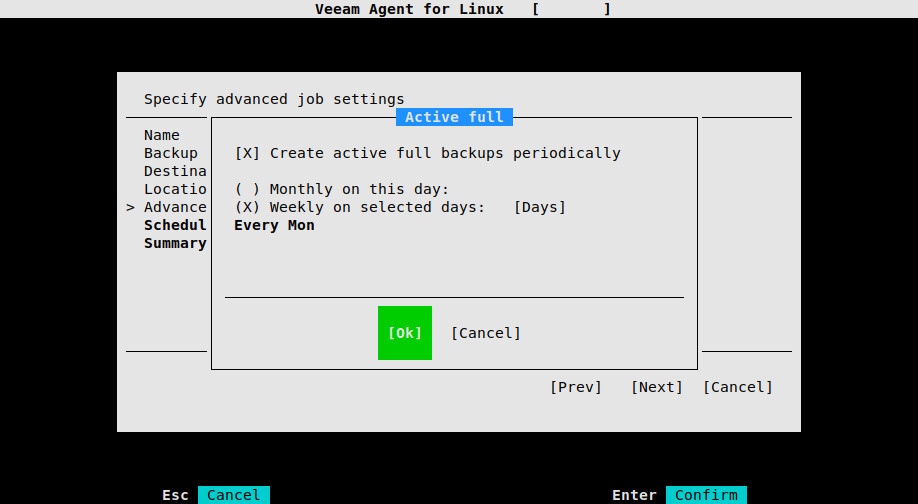
I also recommend enabling Active full backups. It allows Veeam to regularly take scheduled full backups which will reset the chain of incremental backups. This ultimately leads to faster and more reliable backups and restores.
The last section Scripts, I'll be covering separately later on in this guide. For now just skip it and head to the next section.
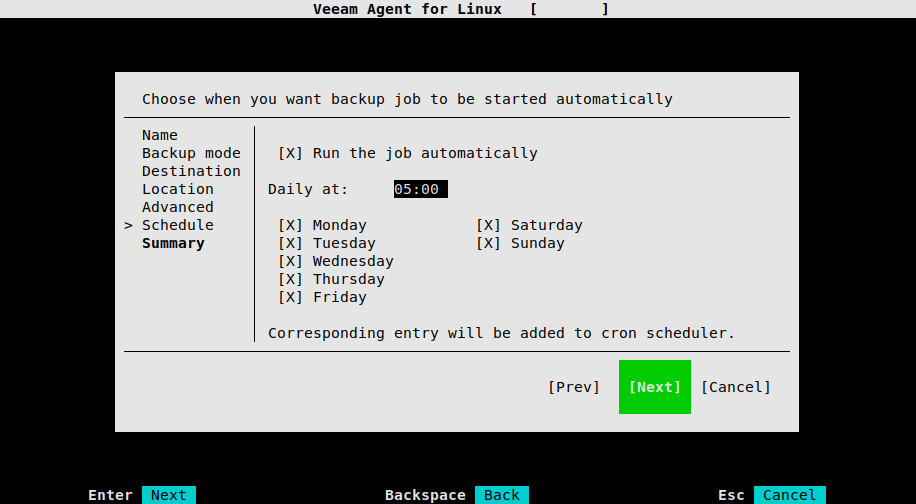
Next, we'll setup a Schedule for the backups to run on.
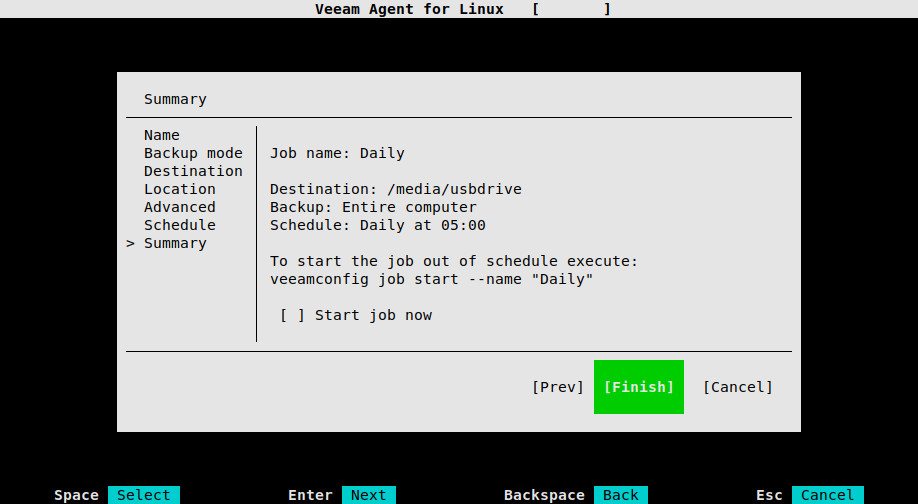
On the Summary page, confirm that the backup settings are configured to your liking. You can choose to fire the first backup right away or wait until the next scheduled backup time. Select Finish to complete.
Email Notification
As mentioned earlier, the one glaring feature missing from Veeam Agent for Linux is email notification. To rectify this situation we are going to run a script after each backup which will email the results.
First we will install a community created script which does all the heavy lifting for us. You will need to have mail relay setup on the server that Veeam is running on though. Unfortunately, that is out of the scope of this guide, but you'll find a lot of How-To's on the net.
Install & Setup Email Script
sudo mkdir /opt/vee-mail
sudo apt install git
sudo git clone https://github.com/grufocom/vee-mail /opt/vee-mail
Edit the config file an enter the Backup Job Name and your To & From Address.
sudo nano /opt/vee-mail/vee-mail.config
JOBNAME="BackupJob1"
EMAILFROM="[email protected]"
EMAILTO="[email protected]"
*NOTE: The config file provides the option to enter credentials if you're backing up to a Samba share in order to provide disk usage stats. I would advise against including them for security reasons.
We'll now change our Veeam backup job to run this script after each backup.
Configure Veeam Post-Job Settings
Start off by launching the Veeam console.
sudo veeam
Type "C" and then "Enter" to reconfigure the backup.
Leave all the settings the same and advance through the configuration until you reach the Advanced Settings screen. Then enter the Scripts settings.
Enter the email script location, /opt/vee-mail/vee-mail.sh, in the Post-job section.
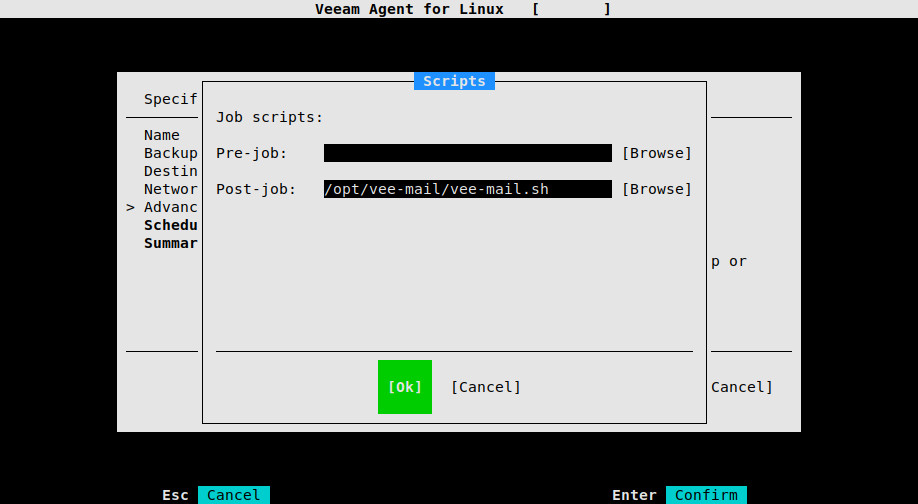
Click OK, leave the rest of the settings the same and click Finish to save your settings.
You'll now receive an email formatted in a nice template after every backup job.
MySQL/MariaDB Backups
Unfortunately, Linux doesn't have the luxury of VSS (Volume Shadow Service) like Windows does, so if your database is mid-transaction during backup, there's a chance that the database backup will be left in an inconsistent state. The commercial version of Veeam does include a way to directly access your database during backups to take consistent backups, but this is not the case for the free version.
However, Veeam does provide three options for backing up databases listed here in this article. While this may not be feasible for all users, I'll be focusing on the first option which creates a local database backup before the image is taken and deletes it after it's done.
I highly recommend you read my guide on Automating MariaDB Backups as it will show you how to create encrypted backups of your databases which can be used with Veeam.
Once you have encrypted database backups setup, you can use that same command in a Veeam Pre-Job script to take a temporary backup of all your databases.
Create Veeam Pre & Post-Job Scripts
First we'll create the Pre-Job script which will take a temporary backup of all our databases.
sudo install -m 700 /dev/null /etc/veeam/pre-job.sh
sudo nano /etc/veeam/pre-job.sh
Copy the sample script below into pre-job.sh and Save.
#!/bin/bash
echo "Executing Veeam Database Backup" | logger
mysqldump --routines --triggers --events --quick --single-transaction --all-databases | bzip2 | openssl smime -encrypt -binary -text -aes256 -out /var/lib/mysql/veeam-alldb-backup.sql.bz2.enc -outform DER /etc/mysql/mdbbackup-pub.key
if [ $? -ne 0 ]
then
	echo "Veeam Database Backup Failed" | logger
	exit 2
else
	echo "Veeam Database Backup Successful" | logger
	sync;sync
fi
*NOTE: If you don't want to go through the process of encrypting your temporary database backups, you can edit the mysqldump command used in the Pre-Job script to backup without encryption. Just replace the existing command with this, mysqldump --routines --triggers --events --quick --single-transaction --all-databases | bzip2 > /var/lib/mysql/veeam-alldb-backup.sql.bz2
Next we'll create the Veeam Post-Job script to delete the temporary database backup.
sudo install -m 700 /dev/null /etc/veeam/post-job.sh
sudo nano /etc/veeam/post-job.sh
Copy the sample script below into post-job.sh and Save.
#!/bin/bash
db_backup="/var/lib/mysql/veeam-alldb-backup.sql.bz2.enc"

if [ -f $db_backup ]
then
	echo "Deleting Veeam Database Backup" | logger
	rm -f $db_backup > /dev/null 2>&1
	exit 0
else
	echo "Could not locate Veeam Database Backup" | logger
	exit 1
fi
If you've chosen to setup Email Notification in the last step, we'll need to add a call at the end of the Vee-Mail script as Veeam can only run one Pre-Job and one Post-Job script.
Just add this line right above "exit" at the bottom of the vee-mail.sh script. The end of the script should look like this.
sh /etc/veeam/post-job.sh
exit
Now we need to add the two scripts to the Veeam backup job.
Add Pre & Post-Job Scripts to Veeam Backup Job
Exactly like the Email Notification setup, we'll need to launch Veeam and edit the Script setting.
sudo veeam
Type "C" and then "Enter" to reconfigure the backup.
Leave all the settings the same and advance through the configuration until you reach the Advanced Settings screen. Then enter the Scripts settings.
Now we'll add the Pre-Job path, /etc/veeam/pre-job.sh, & the Post-Job path, /etc/veeam/post-job.sh, to the Script settings.
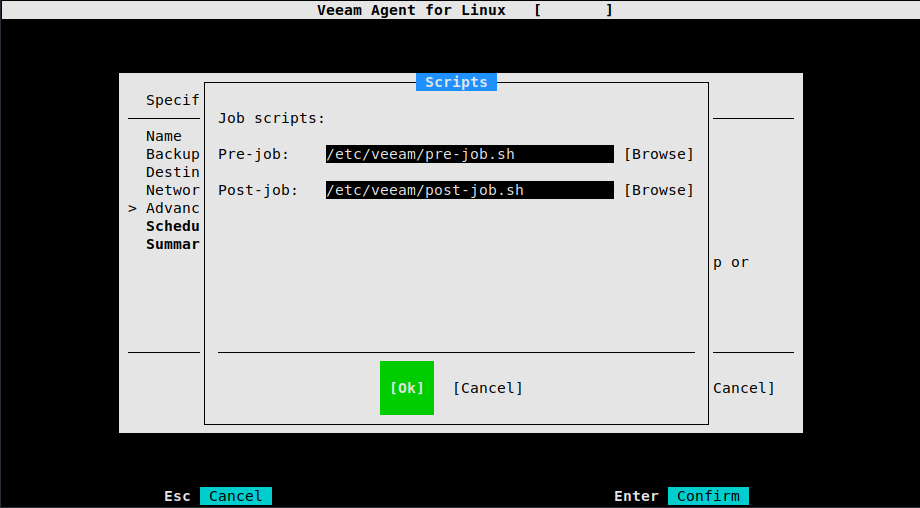
*NOTE: If you've setup Email Notification and already have the Post-Job setting pointed at the Vee-Mail script, just leave it set to /opt/vee-mail/vee-mail.sh. As stated in the previous step, the Vee-Mail script should now be calling the Post-Job script with the extra line that was added.
Click OK, leave the rest of the settings the same and click Finish to save your settings.
You'll now have full image backups with the ability to restore consistant database backups as well.
Restoring From Backup
If you need to restore files from backup, all you need to do is launch Veeam and type "R" to access the Recovery menu.
From there, you can select from any of the available backups and the entire image will be mounted automatically to /mnt/backup. When you're doing copying the files you need restored, just type "U" in the Veeam console to unmount the backup.
If you suffer a catastrophic failure and you need to do a bare-metal restore, you can create a bootable USB drive by downloading the latest Veeam Linux Recovery Media from Veeam's website. If you created a Custom Recovery ISO during the Veeam setup process, you can create a bootable USB drive from that instead.
 :
: